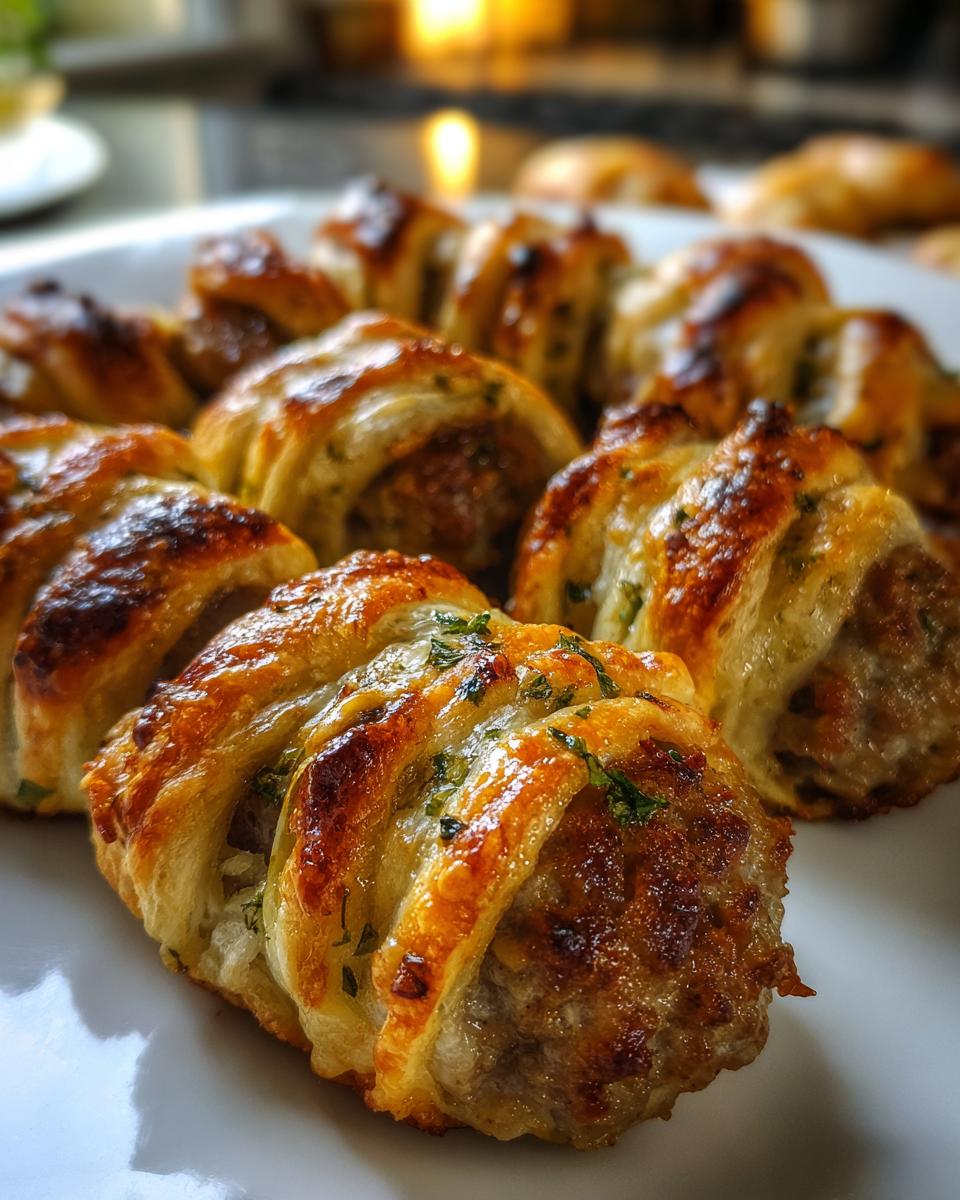
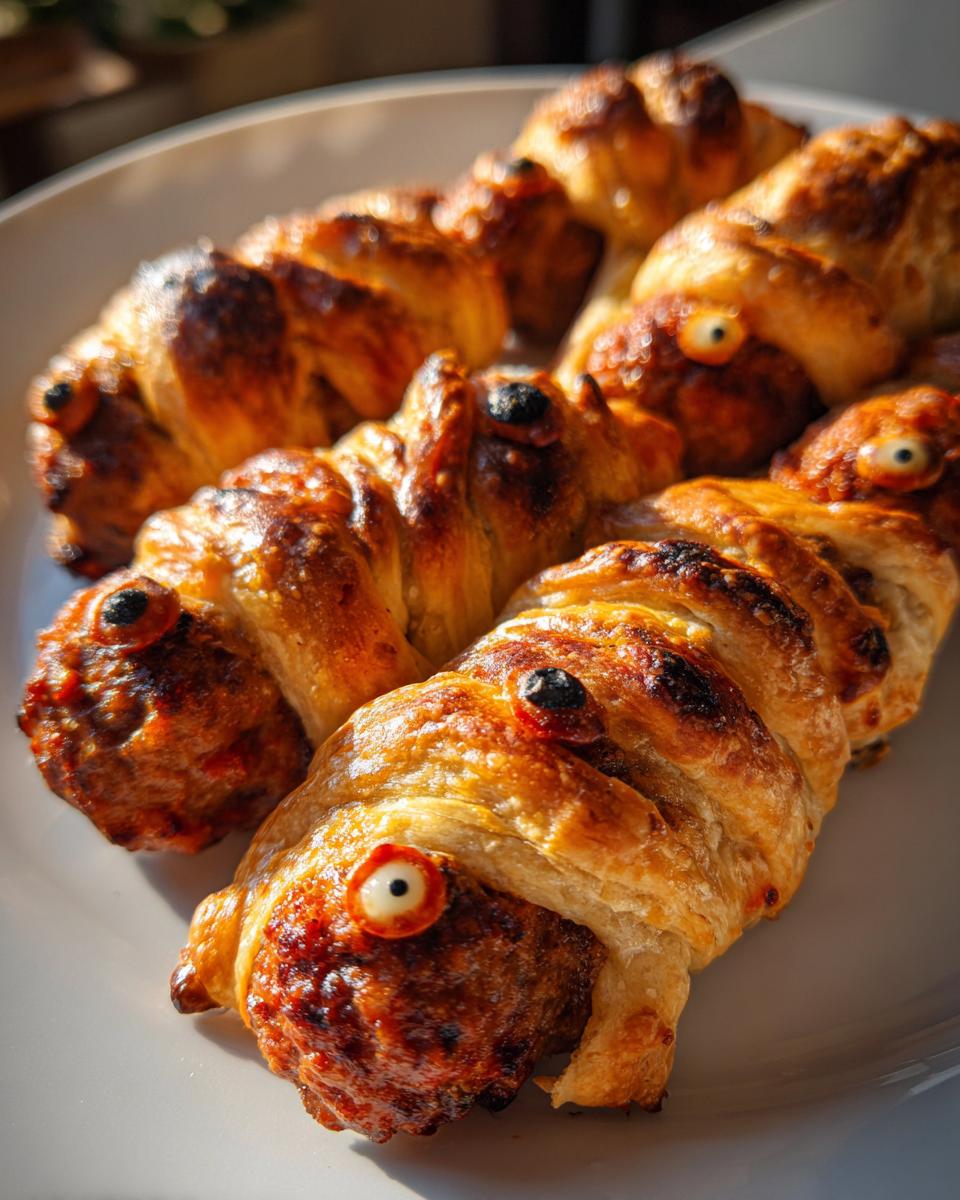
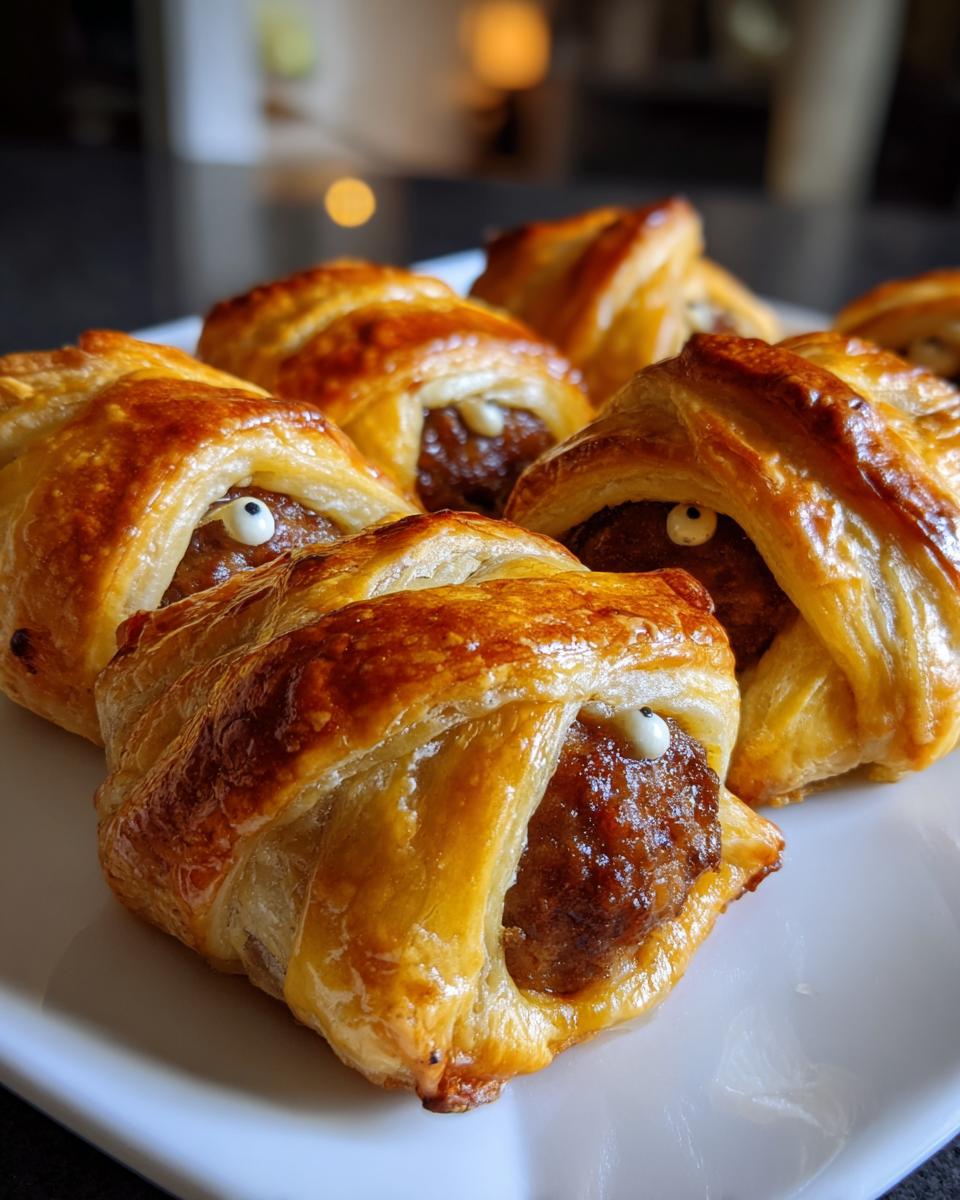
Oh my gosh, you have to try these puff pastry wrapped mummy meatballs at your next Halloween party! They’re the perfect mix of spooky and adorable, and trust me, both kids and adults will go crazy for them. I first made these for my niece’s Halloween bash last year, and within minutes, the tray was empty – turns out even the “too cool” teenagers couldn’t resist grabbing a couple (or five!).
The best part? These little mummies are seriously easy to make. Just a few simple ingredients, some creative wrapping, and voila – you’ve got yourself the cutest Halloween appetizer that looks way more impressive than the effort required. I love how the puff pastry bakes up golden and flaky, creating that perfect “bandaged” mummy look when you crisscross the strips just right.
What makes these puff pastry wrapped mummy meatballs so special is how they combine two crowd-pleasers – juicy meatballs and buttery pastry – into one fun, festive package. And don’t worry if you’re not a master chef – I promise these are foolproof. Even my first attempt (which involved some seriously wonky-looking mummies) still tasted amazing!
Why You’ll Love These Puff Pastry Wrapped Mummy Meatballs
This recipe has become my go-to Halloween appetizer for so many reasons:
- Super easy to make – The whole process takes less than an hour, even if you’re making the meatballs from scratch like I do
- Total crowd-pleaser – Kids go crazy for the cute mummy faces, while adults can’t resist that flaky pastry and juicy meatball combo
- Perfect party food – They’re just the right size for grabbing, and look amazing arranged on a spooky platter
- Endlessly customizable – Use your favorite ground meat, add spices, or switch up the dipping sauces to match your taste
Honestly, they’re so fun to make that I sometimes whip up a batch just because – no Halloween party required!
Ingredients for Puff Pastry Wrapped Mummy Meatballs
Here’s everything you’ll need to make these adorable little mummies come to life in your kitchen. I’ve learned through trial and error that using the right ingredients makes all the difference!
- 1 lb ground beef (I swear by 80/20 blend – that bit of fat keeps the meatballs juicy)
- 1/2 cup plain breadcrumbs (the dry kind, not fresh – they help bind everything together)
- 1 large egg, beaten (this is our glue! Room temp works best)
- 1 tsp garlic powder (trust me, don’t skip this flavor booster)
- 1 tsp onion powder (adds that savory depth we love)
- 1/2 tsp salt (adjust to taste, but don’t be shy)
- 1/4 tsp black pepper (freshly cracked if you have it)
- 1 sheet puff pastry (thawed but still cold – warm dough is a nightmare to work with)
- 1 tbsp water (just a splash for sealing the pastry)
- 24 small edible eyeball decorations (the fun part! Look for candy eyes in baking aisles)
Pro tip: Keep everything cold except the egg – warm meat makes for tough meatballs, and we want these babies tender!
How to Make Puff Pastry Wrapped Mummy Meatballs
Okay, let’s get these little mummies wrapped up! I promise it’s easier than it looks – just follow these simple steps and you’ll have the cutest Halloween appetizers on the block. The key is not to stress about making them perfect – slightly messy mummies are actually more charming!
Preparing the Meatball Mixture
First, preheat your oven to 400°F – this is crucial for getting that puff pastry nice and flaky. Now, let’s make the meatballs! In a large bowl, gently mix together the ground beef, breadcrumbs, egg, garlic powder, onion powder, salt, and pepper. I like to use my hands (clean ones, of course!) because you can really feel when everything is just combined. Don’t overmix – that’s the secret to tender meatballs! Once mixed, roll tablespoon-sized portions into balls. I aim for about 1-inch diameter – small enough to be cute but big enough to hold their shape.
Wrapping the Meatballs with Puff Pastry
Here’s where the magic happens! Roll out your thawed puff pastry on a lightly floured surface to about 1/8-inch thickness. Using a pizza cutter or sharp knife, slice the pastry into thin strips – about 1/4-inch wide. Now the fun part: wrap each meatball with 2-3 strips, crisscrossing them like mummy bandages. Leave a little space uncovered for the “face” where we’ll add the eyes later. Don’t worry about being too neat – irregular wrapping makes them look more authentically mummy-like! Press the ends gently to seal, using a tiny dab of water if needed.

Baking and Finishing Touches
Place your little mummies on a parchment-lined baking sheet about an inch apart. Pop them in the oven for about 20 minutes, or until the pastry is golden brown and puffed up beautifully. While they’re still warm (but not piping hot), gently press two candy eyeballs into each exposed “face” area. The warmth will help them stick. And there you have it – the most adorable, delicious Halloween treat that’s sure to disappear faster than a ghost in the night!

Tips for Perfect Puff Pastry Wrapped Mummy Meatballs
After making these adorable mummies more times than I can count (my neighbors now expect them every October!), I’ve picked up some foolproof tricks to guarantee success:
Keep everything cold: I pop my meatballs in the fridge for 15 minutes before wrapping – cold meat holds its shape better when working with the pastry. Same goes for the puff pastry – thawed but still chilly is perfect!
Pizza cutter magic: For perfectly even pastry strips every time, I swear by my pizza cutter. It glides through the dough effortlessly, giving me those uniform “bandages” that make the mummies look professionally done.
Egg wash for golden shine: Want that bakery-perfect golden color? Just brush your wrapped mummies with a beaten egg before baking. It gives them that gorgeous shine!
Pat meatballs dry: If your meatballs are looking a bit shiny, give them a quick pat with paper towels before wrapping. This prevents soggy pastry – nobody wants a flabby mummy!
Work in batches: If the kitchen’s warm, I only take out half the pastry at a time. Warm dough is sticky and harder to work with, while cold dough behaves beautifully.
Ingredient Substitutions and Variations
Don’t stress if you’re missing an ingredient or need to accommodate dietary needs – these puff pastry wrapped mummy meatballs are super flexible! For a lighter version, ground turkey or chicken works beautifully (just add an extra tablespoon of olive oil to keep them moist). My gluten-free friends swear by using crushed gluten-free crackers instead of breadcrumbs. And yes, you can absolutely make these vegetarian – just swap in your favorite plant-based meat alternative and vegan puff pastry (check the freezer section!).
For those with egg allergies, a flax egg (1 tbsp ground flax + 3 tbsp water) binds the mixture just fine. And if candy eyes aren’t your thing, tiny dollops of cream cheese with black sesame seeds make adorable (and tasty!) edible eyes too. The possibilities are endless – have fun making this recipe your own!
Serving and Storing Puff Pastry Wrapped Mummy Meatballs
These little mummies are absolute showstoppers served warm right from the oven – the puff pastry stays crispest this way. I always set out small bowls of marinara sauce (for dipping those “bandages”) and BBQ sauce (because who can resist?) on the side. For extra fun, arrange them on a black platter with some plastic spiders crawling around!
If you’ve got leftovers (unlikely, but it happens!), store them in an airtight container in the fridge for up to 3 days. When reheating, skip the microwave – it’ll make the pastry soggy. Instead, pop them back in a 350°F oven for 5-7 minutes to revive that perfect crispiness. They freeze beautifully too – just wrap unbaked mummies tightly and bake straight from frozen, adding a few extra minutes to the cooking time.

Nutritional Information for Puff Pastry Wrapped Mummy Meatballs
Just a quick note – these numbers are estimates based on my standard recipe, but your exact counts might vary depending on ingredients and sizes. For one mummy meatball (about the size I make them), you’re looking at:
- 85 calories – Perfect little bite-sized treat!
- 5g fat (2g saturated) – Thank that flaky puff pastry
- 5g protein – A nice little protein boost in every bite
- 5g carbs – Mostly from the pastry and breadcrumbs
Remember, portion sizes may vary – my niece’s “sample” meatballs somehow always end up bigger than mine!
Frequently Asked Questions
Can I freeze puff pastry wrapped mummy meatballs? Absolutely! I freeze them all the time for last-minute Halloween parties. Just assemble the mummies with raw meatballs, wrap tightly, and freeze on a baking sheet before transferring to a freezer bag. When ready, bake straight from frozen – just add 5-7 extra minutes. So handy!
Can I use store-bought meatballs to save time? You bet! Those frozen pre-made meatballs work great in a pinch. Thaw them first, pat dry (super important to prevent soggy pastry!), then wrap as usual. Since they’re already cooked, you might need to reduce baking time by 5 minutes – just watch for that golden pastry.
How do I keep the puff pastry from getting soggy? My top trick? Pat those meatballs dry with paper towels before wrapping! Also, don’t over-oil your baking sheet – parchment paper works best. If your kitchen is humid, I sometimes pop the wrapped mummies in the fridge for 10 minutes before baking to firm everything up.
What if I can’t find edible eyeball decorations? No worries! Get creative – tiny dabs of cream cheese with black pepper or poppy seeds work great. One year I even used mini marshmallows with food marker dots when I was in a pinch. The kids thought it was hilarious!
Tag me in your Halloween party photos – I’d love to see your puff pastry wrapped mummy meatball creations! #MummyMeatballMagic
Print
Spooky Puff Pastry Wrapped Mummy Meatballs in 4 Easy Steps
- Total Time: 40 minutes
- Yield: 24 mummy meatballs 1x
- Diet: Low Lactose
Description
Fun and easy puff pastry wrapped meatballs shaped like mummies, perfect for Halloween parties.
Ingredients
- 1 lb ground beef
- 1/2 cup breadcrumbs
- 1 egg
- 1 tsp garlic powder
- 1 tsp onion powder
- 1/2 tsp salt
- 1/4 tsp black pepper
- 1 sheet puff pastry, thawed
- 1 tbsp water
- 24 small edible eyeball decorations
Instructions
- Preheat oven to 400°F.
- Mix ground beef, breadcrumbs, egg, garlic powder, onion powder, salt, and pepper in a bowl.
- Shape mixture into small meatballs.
- Roll out puff pastry and cut into thin strips.
- Wrap strips around each meatball, leaving space for eyes.
- Place on baking sheet and bake for 20 minutes.
- Press edible eyeballs into exposed meatball areas.
- Serve warm.
Notes
- Use pre-made meatballs to save time.
- Thaw puff pastry according to package instructions.
- Serve with ketchup or mustard for dipping.
- Prep Time: 20 minutes
- Cook Time: 20 minutes
- Category: Appetizer
- Method: Baking
- Cuisine: American
Nutrition
- Serving Size: 1 meatball
- Calories: 85
- Sugar: 0.5g
- Sodium: 120mg
- Fat: 5g
- Saturated Fat: 2g
- Unsaturated Fat: 2.5g
- Trans Fat: 0g
- Carbohydrates: 5g
- Fiber: 0.5g
- Protein: 5g
- Cholesterol: 25mg


