Introduction: How to Make Perfect 6-Minute Caramels
Craving a quick, sweet treat? With just six minutes, you can whip up rich, creamy caramels that melt in your mouth. These homemade delights combine simplicity with indulgence, making them perfect for any occasion.
- For more dessert inspiration, explore the Creamy Cherry Delight Dessert on our site. Its no-bake simplicity pairs wonderfully with these caramels.
- Many love pairing caramels with creative recipes like Easy Cake Mix Toffee Bars for added crunch and flavor.
What’s the secret? High-quality ingredients and a microwave save time while ensuring delicious results. If you’re a fan of quick desserts, check out the time-saving hacks in our Strawberry Cheesecake Dump Cake recipe.
Indulge in these 6-minute wonders today and share them as gifts or serve them fresh for an unbeatable treat. Try them now!
What Are 6-Minute Caramels?
6-Minute Caramels are a game-changer for anyone who loves homemade candy. These soft, chewy delights take only minutes to prepare, delivering luxurious flavor without the hassle of traditional caramel-making methods.
- Unlike stovetop recipes, they require no special skills or candy thermometers.
- They’re made quickly in the microwave, making them accessible for beginners.
What makes these caramels special is their versatility. They can be enjoyed as-is or enhanced with flavors like vanilla or sea salt. For those looking to expand their dessert repertoire, these pair beautifully with the Easy Cake Mix Toffee Bars, offering a crunchy contrast to the caramels’ creamy texture.
Additionally, 6-Minute Caramels are perfect for gifting. Simply wrap them in parchment paper, and you have a thoughtful homemade treat. If you’re planning a dessert spread, consider adding them alongside other quick recipes like our Strawberry Cheesecake Dump Cake for a stunning variety.
Try these caramels today to experience the joy of a quick, easy, and irresistibly sweet treat. They’ll become your go-to recipe for all occasions!

Key Ingredients for 6-Minute Caramels
Creating 6-Minute Caramels requires just a few simple ingredients, but each plays a crucial role in delivering their signature richness and texture. Here’s what you’ll need:
1. Butter
- Provides the essential creaminess and smooth texture.
- Use unsalted butter for better control of the caramel’s flavor.
2. Brown Sugar
- Adds depth with its natural molasses content, resulting in rich, golden tones.
- Light or dark brown sugar can be used, depending on your preference.
3. Sweetened Condensed Milk
- This ingredient is the backbone of the recipe, contributing to the caramel’s sweetness and silky consistency.
- Be sure to use full-fat condensed milk for the best results.
4. Light Corn Syrup
- Prevents crystallization, ensuring a smooth caramel every time.
- Alternatively, golden syrup can be used for a deeper flavor.
5. Vanilla Extract
- Enhances the overall flavor with its aromatic sweetness.
- Add it after cooking for a more pronounced taste.
These ingredients come together to create a base that’s versatile and adaptable. For example, adding a pinch of sea salt can transform the caramels into a salted version, which pairs well with recipes like Strawberry Cheesecake Dump Cake.
For an extra layer of indulgence, combine your caramels with Easy Cake Mix Toffee Bars. The contrast between chewy and crunchy textures is truly irresistible.
Experiment with these ingredients to discover your ideal caramel recipe, whether for a snack or a homemade gift!
Savor Recipes, Bliss, and Prizes!
Join our foodie family for drool-worthy recipes, exclusive tips, and a chance to WIN our irresistible recipe eBook. We promise—no spam, just delicious bites!
You're In! Get Ready for Deliciousness!
Equipment Needed for 6-Minute Caramels
Making 6-Minute Caramels is incredibly simple, and you only need a few basic tools to get started:
1. Microwave-Safe Bowl
- Essential for safely heating your ingredients.
- Choose a large bowl to prevent spills during cooking.
2. Heat-Resistant Spatula
- Perfect for stirring the caramel mixture evenly.
- Avoid using metal utensils, as they can scratch your bowl.
3. Measuring Cups and Spoons
- Ensure precise measurements for the best results.
- Accuracy is key to achieving the ideal caramel consistency.
4. Parchment Paper or Wax Paper
- Prevents the caramels from sticking as they cool.
- Great for wrapping individual pieces if gifting.
5. Baking Dish
- Used to set and shape your caramel.
- Line it with parchment for easy removal.
With these tools, you can create perfect caramels every time. For dessert inspiration, pair your caramels with recipes like Easy Cake Mix Toffee Bars for a crunchy treat.
Additionally, these tools are versatile enough to prepare other recipes, such as the Strawberry Cheesecake Dump Cake, making them invaluable in your kitchen.
Having the right equipment ensures a stress-free cooking experience, so gather these tools and enjoy crafting your delicious homemade caramels!

Common Mistakes and How to Avoid Them in 6-Minute Caramels
Even with a simple recipe, mistakes can happen. Here are common pitfalls when making 6-Minute Caramels and how to avoid them:
1. Overcooking the Caramel
- Mistake: Leaving the mixture in the microwave for too long can result in hard or burnt caramels.
- Solution: Always follow the cooking times closely, and check the caramel’s texture halfway through.
2. Uneven Cooking
- Mistake: Microwaving without stirring can cause hotspots, leading to uneven consistency.
- Solution: Stir the mixture thoroughly between intervals to distribute heat evenly.
3. Using the Wrong Bowl
- Mistake: A bowl that isn’t microwave-safe or too small can cause spills or uneven cooking.
- Solution: Use a large, heat-safe bowl to allow space for bubbling.
4. Caramels Sticking to the Dish
- Mistake: Skipping the parchment paper leads to difficulty removing caramels.
- Solution: Line the dish with parchment paper for easy removal and cleanup.
For best results, use reliable recipes like our Easy Cake Mix Toffee Bars for complementary treats. Pairing these two recipes can elevate any dessert table.
With these tips, you can avoid common mistakes and create perfect, melt-in-your-mouth 6-Minute Caramels every time. Give it a try today!
Storing and Serving 6-Minute Caramels
Proper storage is key to maintaining the soft texture and rich flavor of your 6-Minute Caramels. Here’s how to store and serve them:
Storing Tips
- Wrap individual pieces in parchment or wax paper to prevent sticking.
- Store in an airtight container at room temperature for up to two weeks.
- For longer storage, refrigerate them in a sealed container, but allow them to return to room temperature before serving.
Serving Ideas
- Arrange caramels on a dessert tray alongside treats like Strawberry Cheesecake Dump Cake for a delightful variety.
- Use chopped caramels as toppings for ice cream or baked goods for added sweetness.
- Package them in decorative wrapping for a thoughtful homemade gift.
For a festive touch, pair them with our Easy Cake Mix Toffee Bars. This combination adds a satisfying crunch to complement the caramels’ buttery softness.
With proper storage and creative serving ideas, your 6-Minute Caramels will impress at any gathering or make a delightful personal treat!
Nutritional Information for 6-Minute Caramels
6-Minute Caramels are a delightful indulgence, but moderation is key to enjoying them guilt-free. Here’s an approximate breakdown for one piece:
- Calories: 70
- Total Fat: 3.5g
- Saturated Fat: 2.5g
- Sugar: 9g
- Protein: 0.5g
These values may vary based on portion size and ingredients used. For a lighter option, consider using reduced-sugar alternatives or experimenting with smaller servings.
Pairing these treats with fresh fruits or incorporating them into recipes like Strawberry Cheesecake Dump Cake adds balance to your dessert table.
Enjoy your 6-Minute Caramels as an occasional treat while savoring their rich, buttery flavor!

Expert Tips for Perfect 6-Minute Caramels
Crafting perfect 6-Minute Caramels is easier with these expert tips to elevate your results:
1. Use High-Quality Ingredients
- Opt for unsalted butter and fresh sweetened condensed milk for rich, creamy caramels.
- Avoid substitutions like margarine, which can impact flavor and texture.
2. Monitor Microwave Power
- Different microwaves vary in power, which can affect cooking time.
- Cook in 1-2 minute intervals, stirring between, to ensure even heating.
3. Stir Thoroughly
- Mix ingredients well at every step to prevent grainy texture.
- A heat-resistant spatula is ideal for scraping sides and incorporating ingredients.
4. Line Your Dish Properly
- Always use parchment paper to avoid sticking.
- It also makes cleanup easy and ensures neat caramel squares.
5. Add Flavors After Cooking
- For more pronounced flavor, stir in vanilla or sea salt after cooking.
- This prevents loss of aromatic notes during the heating process.
For more sweet inspiration, pair your caramels with the Strawberry Cheesecake Dump Cake for a dessert spread everyone will love.
Following these expert tips ensures consistent, melt-in-your-mouth caramels every time. Experiment with flavors and variations to make them your signature treat!
Creative Variations and Recipes for 6-Minute Caramels
While classic 6-Minute Caramels are delicious, experimenting with variations can take your treats to the next level. Here are some creative ideas to try:
1. Salted Caramels
- Sprinkle sea salt on top before the caramels set for a perfect sweet-and-salty combo.
- Pair with desserts like Strawberry Cheesecake Dump Cake for added flavor depth.
2. Chocolate-Dipped Caramels
- Once cooled, dip the caramels halfway in melted chocolate and let them harden.
- This adds a luxurious touch and makes them great for gifting.
3. Nutty Caramels
- Stir in chopped pecans, almonds, or walnuts for a delightful crunch.
- These pair well with crunchy treats like Easy Cake Mix Toffee Bars.
4. Spiced Caramels
- Add a pinch of cinnamon, nutmeg, or pumpkin spice for a seasonal twist.
- These make perfect holiday treats.
5. Liquor-Infused Caramels
- Mix in a teaspoon of bourbon or rum after cooking for a sophisticated flavor.
With these variations, you can customize 6-Minute Caramels for any occasion. Let your creativity shine and share these delicious twists with family and friends!

FAQs About 6-Minute Caramels
1. What makes 6-Minute Caramels unique?
6-Minute Caramels are quick, easy, and require no candy thermometer. They deliver rich, creamy texture in minimal time.
2. Can I use salted butter instead of unsalted?
Yes, but reduce or omit additional salt in the recipe to balance the flavor.
3. Why is my caramel grainy?
Graininess happens when sugar isn’t fully dissolved. Stir thoroughly and heat evenly to prevent this issue.
4. Can I make variations like salted or chocolate-dipped caramels?
Absolutely! Add sea salt for salted caramels or dip them in melted chocolate for a decadent treat.
5. How do I prevent the caramels from sticking?
Line your dish with parchment paper and wrap finished pieces in wax paper to avoid sticking.
6. How long do 6-Minute Caramels last?
When stored in an airtight container, they last up to two weeks at room temperature or longer in the fridge.
7. Can I double the recipe?
Yes, but use a larger microwave-safe bowl to avoid overflow and adjust cooking time as needed.
For more dessert inspiration, check out recipes like Strawberry Cheesecake Dump Cake to pair with your caramels!
Print
Perfect 6-Minute Caramels
5 Stars 4 Stars 3 Stars 2 Stars 1 Star
No reviews
- Author: Bites & Bliss
Description
6 Minute Caramels are the ultimate quick and easy treat. Made entirely in the microwave, these soft, chewy caramels are rich with buttery sweetness and take just minutes to prepare. The combination of brown sugar, corn syrup, and sweetened condensed milk creates a perfectly smooth caramel that melts in your mouth.
Ingredients
1/2 cup unsalted butter
1/2 cup light corn syrup
1/2 cup granulated sugar
1/2 cup brown sugar, packed
1/2 cup sweetened condensed milk
1/2 teaspoon vanilla extract
Sea salt (optional, for sprinkling)
Instructions
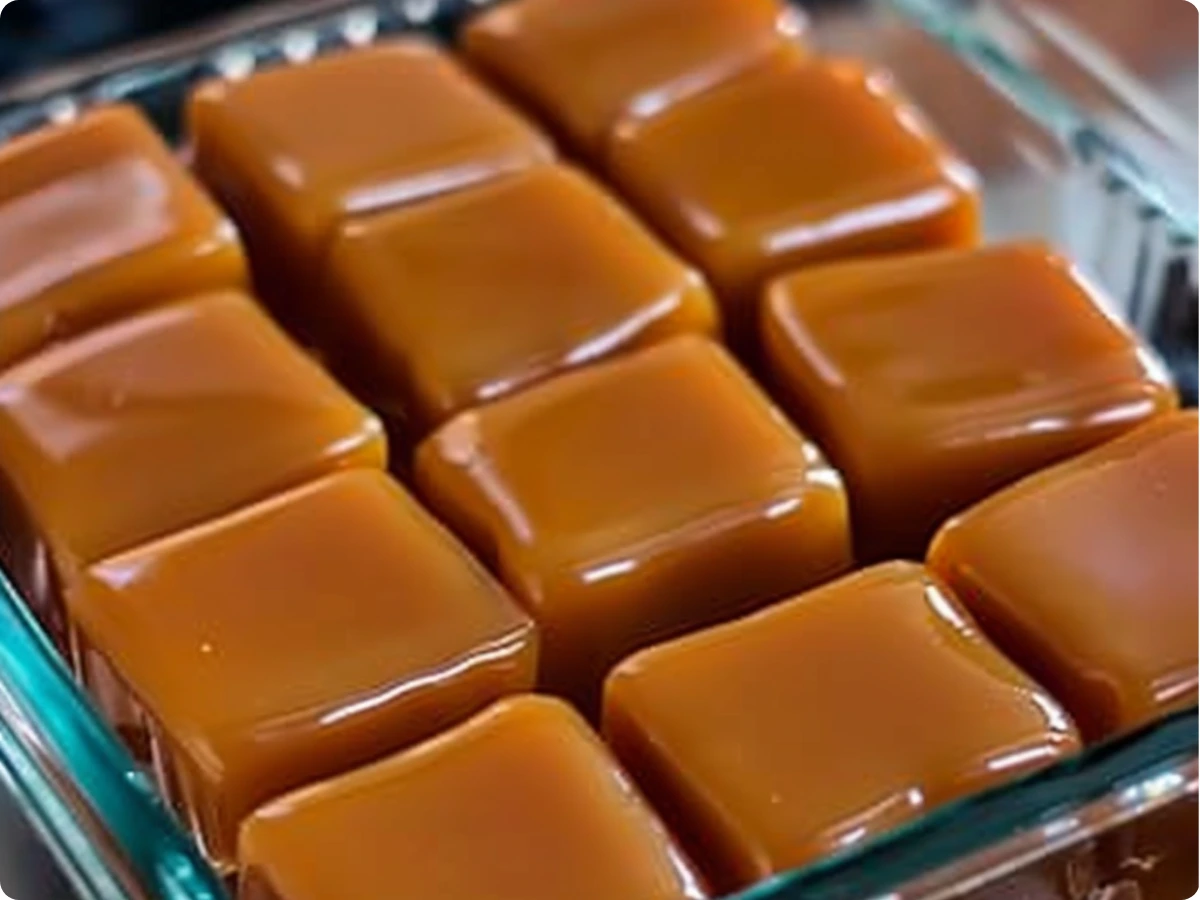
Prepare a Dish: Grease an 8×8-inch dish or line it with parchment paper.
Mix Ingredients: In a large microwave-safe bowl, combine the butter, corn syrup, granulated sugar, brown sugar, and sweetened condensed milk. Stir well to combine.
Microwave: Microwave the mixture on high for 6 minutes, stopping every 2 minutes to stir. After 6 minutes, the caramel should be bubbly and thick.
Add Vanilla: Carefully remove the bowl from the microwave (it will be hot!) and stir in the vanilla extract. If you like a salty-sweet flavor, sprinkle some sea salt over the top.
Cool: Pour the caramel mixture into the prepared dish and let it cool for at least 30 minutes to 1 hour. Once cooled, cut into squares and enjoy!

Love This Recipe? Get More Delivered to Your Inbox!
Subscribe to Bites & Bliss to receive mouthwatering recipes, the latest blog updates, and a chance to win our exclusive recipe eBook!